
Making a Malone Guitars custom electric - part two: carving the neck
- Dec 15, 2020
- 3 min read

In part one of this four-part series, I explained what happens during the design and planning stage of a Malone Guitars custom commission. In this second part, I give a flavour of the body construction process and how I carve necks.
After drawing up full size, detailed plans and making accurate templates, I start by rough shaping the neck and making the body blank - always keeping a very close eye on the all-important centre line!
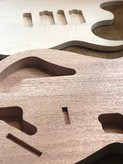
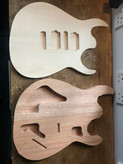
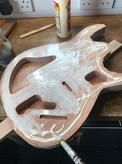
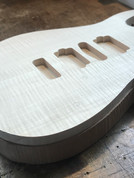
First I cut close to the final body shape line with my band saw, rout any closed cavities and wiring channels, then join the book-matched body cap and back with Titebond.
I use a good number of clamps to ensure even pressure, but don't use a lot of pressure - if the boards are well fitted, it just isn't needed and can even squeeze too much glue out from the joint, or cause the body to warp.

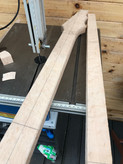


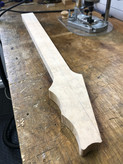


Once the body blank is in decent shape, it's on to neck carving.
There are an absolute ton of ways to carve a neck, from spokeshaves to routers in a variety of jigs, to angle grinders - someone, somewhere, has probably tried carving a neck with every rough and/or sharp and/or spinny thing you can imagine. I've tried a lot of them too, and honestly get the most pleasure from shaping by hand using a Shinto rasp, dragon files, card scrapers, a couple of chisels, and a Mikihisa Kiridashi kogatana - a razor-sharp, Japanese wood carving knife. I feel it affords me a greater degree of control, making it easier to create a neck that is perfect. Most of all though, I got into this profession because I love the simple pleasure of making things out of wood using my hands: neck carving is a very satisfying way to do that.
As many of my customers, friends and followers will already know, I don't use a great many power tools when building my guitars - I prefer to use hand tools where practical. A band saw, router, bench disc sander and drill press are however tools I simply would not do without, mainly because they help produce results that would be far harder to achieve solely by hand.
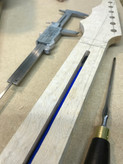
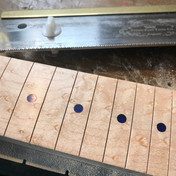
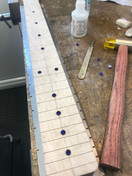
Fret slotting is done manually, using an extremely accurate, CNC cut stainless steel template and mitre guide. With a one-piece neck like this, I usually cut the fret slots and drill the fret markers before starting to carve, as I find it is easier to be very accurate while the neck is in square stock. I cut the slots to final depth once I've established the fingerboard radius.
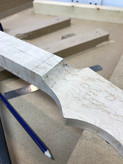
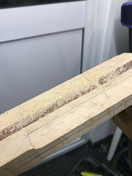
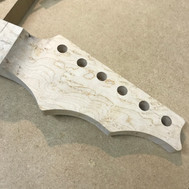
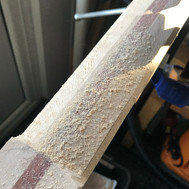
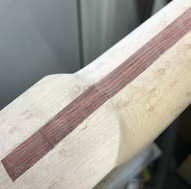
Once I'm happy that I won't have any intonation issues, its time for some power tools - I rout the channel for the two-way truss rod (heel adjust on this one), insert the skunk stripe, thickness the headstock and drill the tuner holes, then get to carving. It's a process of measure, mark, carve, feel, repeat. Once I'm happy with the main portion of the neck, I carefully blend this into both the headstock volute and the neck heel, to ensure the transition between these areas looks and feels great.


In part one I explained the design process for a Malone Guitars custom instrument - in part three I will take you through the body carving process, and in part four show you finishing, final assembly and set up.
Like what you see here? Let me know in the comments!


Comments