
Making a Malone Guitars custom electric - part three: carving the body
- Dec 15, 2020
- 2 min read

In parts one and two of this mini-series, I explained how a Malone Guitars custom commission is designed, how the neck and body are assembled and how the neck is carved. In this part, I'll be showing you the body carving process.
After neck carving, carving the body is one of my favourite steps in creating a custom electric guitar. I like to use a Shinto rasp to remove wood quickly and accurately and leave most of the finer work to thumb planes, gouges and card scrapers.
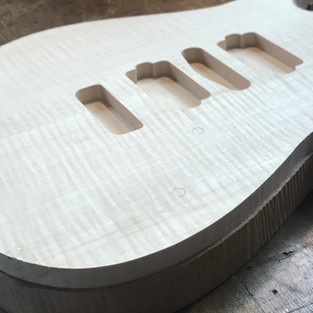
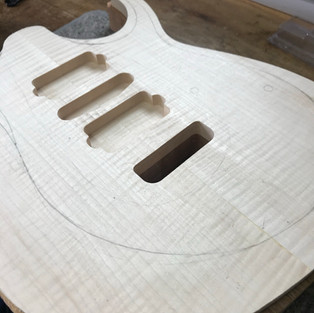
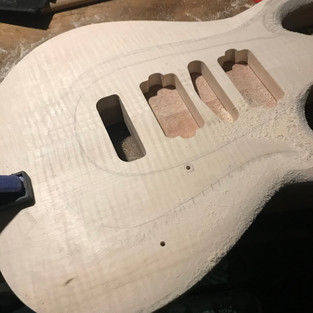
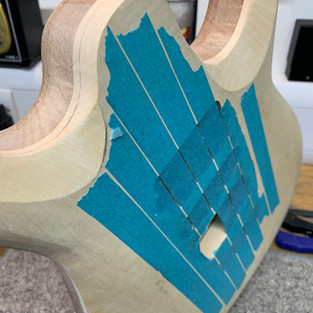
As with neck carving, carving the top is a process of careful measuring and marking, rinse and repeat, to get the best results. First, the cavities are routed front and rear.
Then, contour lines (which are just like you'd see on a map) are marked on the body, to give a visual reference when removing material. As each plane is shaped, new lines are measured and marked, until a gradual radius is achieved from top to edge.
With this guitar, which is unbound, I was aiming for a short, but consistent bevel all around the edge, with a deep carve in the horns for absolute maximum fingerboard access (and, if I'm honest, simply because it looks cool). The area immediately surrounding the pickup and tremolo cavities was left flat.
I added an additional, deep carve on the back, running from the upper horn to the lower horn: this 'comfort carve' helps to reduce the apparent body thickness when playing up the neck, bearing in mind that this instrument is a full 53mm thick - right in Les Paul and PRS territory, and a good deal thicker than your typical S type guitar.


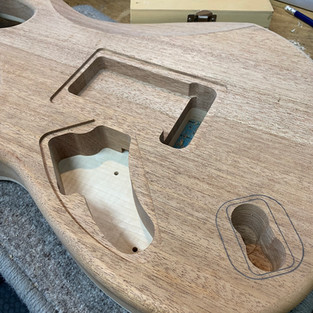


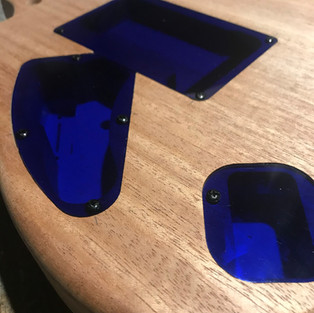


Once I'd routed all the cavities and was happy with the top carve and the rear round over, I made simple templates to match the three electronics cavities. I then used these templates to shape final plates from 3mm transparent blue perspex - the same material as I'd used for the neck dot markers and side dots.
The final significant construction step was to cut the neck pocket and fit the neck. Once I was satisfied that everything was as intended, I carried out a quick test fit/mock-up to make sure everything would fit where it was meant to, and left the guitar tuned to pitch.
It was almost time to break out the aniline dye! Colour time!

In parts one and two I explained the design process for a Malone Guitars custom instrument, then the neck and body construction and how the neck is carved. In part four we will explore finishing, final assembly and set up.
Like what you see here? Want to see more content like this? Let me know in the comments!


Comments